I use this image in my Photo Restoration courses. It is badly stained and on first glance, looks like it would take hours to restore. And had I scanned it as a greyscale image it probably would.
But I never scan photographic images in greyscale. I’m a big fan of RGB (red, green blue). Let me show you why;
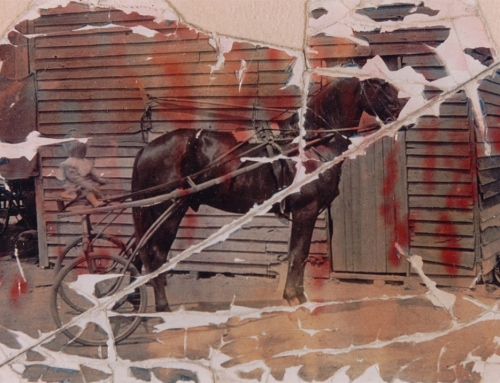
This is the original image scanned and saved as an RGB file. Looks pretty bad. That horrible reddish/yellow stain covers most of the image.

But take the time to inspect each of the individual colour channels and you might be pleasantly surprised.
This is the blue channel…no pleasant surprises here;
 The green channel isn’t much better. At least I can see more of the image but there is nothing to get excited about here either;
 But look at the Red Channel! This is where you can get excited. It’s hard to believe this is the same (unedited) image. The image I originally thought would take quite a few hours to restore will now only take about an hour! There are obviously still areas of damage which require my attention and I will need to do some clever editing to replace the blue and green channels but it is easily done…without losing any hair.
 And here it is restored (with a sepia tone applied).
 Now, had I scanned this image as a greyscale file, this is what I would have had to work with. No hidden surprises lying within colour channels. What you see is what you get: Hmmm, no thanks.
 So the moral to this story, which lacks technical info but instead just uses pictures to demonstrate is……….Scan your images for restoration as RGB, even if they are black and white images. Whilst miraculous results like these cannot be achieved with all images, that extra colour data increases your chances and may just save a few hairs.
![]()